DIY Mickey ears (also called Minnie ears or Disney ears) has become a popular accessory among Disney-goers, and it’s not hard to understand why.
But, as cute as they are, it can be difficult to justify the cost of just one of these iconic Disney accessories that are marketed as a must-have for every Disney trip.
If you have an upcoming trip to Disneyland or Disney World and want to make your own Mickey ears, then you’ve come to the right place.
In this post I’ll share how to affordably and easily make homemade Mickey ears using two simple techniques.
3 Reasons to Create DIY Disney Ears
1. It’s a Great Bonding Activity
Let’s face it: given our busy schedules, we rarely have enough time to spend quality time with our loved ones, especially our kids.
Trying to find the right time is never easy, so if you were looking for a meaningful activity to enjoy with your children during the precious time you have together, then homemade Mickey ears is the way to go.
2. Crafts Are Great for Development
I’m not just talking about refining fine motor skills and creativity. I’m also referring to the sense of accomplishment children will get from doing homemade crafts.
Crafts are important for development because they help improve self-esteem and boost morale, something we’re all struggling with coming out on the other side of a pandemic.
3. Mickey Mouse Ears Are Cheaper to Make
You can obviously purchase Disney ears at the parks or at most Disney Stores. However, these will cost more than a pair you make yourself, and that cost only goes up the more pairs you purchase.
Think of homemade Mickey ears as an opportunity cost for spending time with your kids as you prepare for your magical vacation.
How To Make DIY Mickey Ears 2 Different Ways
There are different ways to make DIY Disney ears, but among the easiest is the no-sew option, and there are two routes you can take with this.
Option 1: Mickey Ears Starters
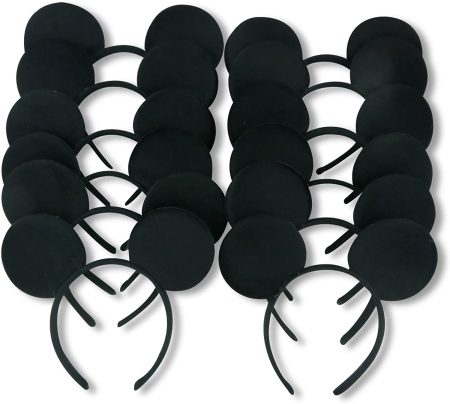
Taking this route requires purchasing Mickey ears starters, which become the starting point from which to add your preferences and personal flair.
This is a nice way to test your children’s creativity. Explore different ways to transform the basic Mickey ears template by adding unique characteristics to make it your own. Try using craft foams, glitter foams, and other creative materials.
Since this is a no-sew guide, you’re going to be using some type of adhesive, but a hot glue gun is going to work best.
Pros of Using Ears Starters:
- DIY Mickey and Minnie ears take less time and effort to make with ears starters.
- Perfect for busy families who want to find time to bond with their children.
Cons of Using Ears Starters:
- Mickey ears made from ears starters tend to be less sturdy and of inferior quality in comparison to ones made from scratch.
- In terms of customization, you’re limited in size and colors of the ears.
If you don’t mind sacrificing some personalization and durability for the comfort and convenience of not having to make Mickey ears from scratch, then this method is the one for you.
On the other hand, if you value customizing and making your crafts last longer, then I think you might find the second method of making homemade Mickey ears more appealing.
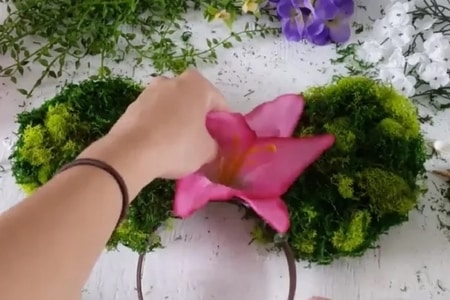
Photo credit: Sugar, Spice, and Glitter
Materials And Tools Needed
Essential:
Optional:
Try to mix and match between these options and see what wonderful Disney ears you can create!
3 Ides for DIY Mickey Ears to Try With Ears Starters
Below are 3 examples of Mickey ears that you can try experimenting with. Use each as inspiration for the style, color, and accessories you can attempt with your Mickey ears starters!
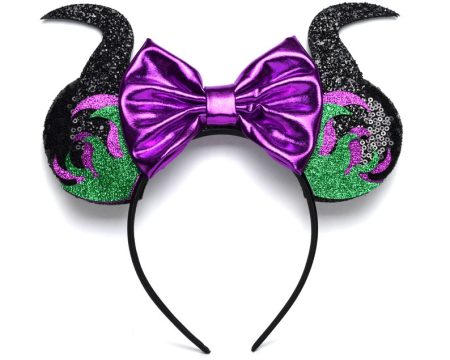
Sometimes heroes and princesses don’t discover their true selves unless their antagonists challenge them. If your children would like to play the villain for once, try doing something like these Maleficent-themed Minnie ears.

Halloween is right around the corner, so what better Halloween craft is there to make than Halloween Mickey Mouse ears like these?
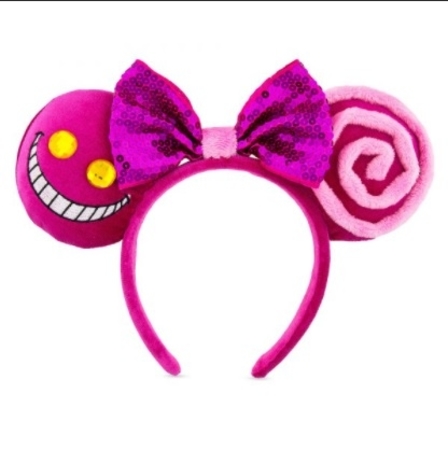
Disney fans will instantly recognize Alice In Wonderland-inspired Mickey ears. The color of the headband and Cheshire Cat’s grin are iconic.
Option 2: Making DIY Mickey Ears From Scratch
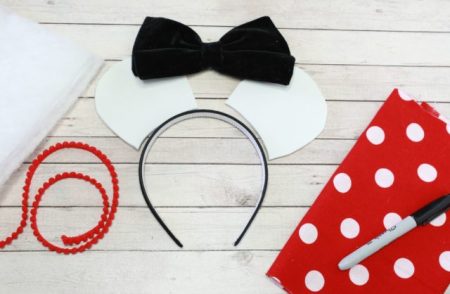
Photo credit: Moms Without Answers
This second method, which I highly recommend, allows you to create Mickey or Minnie ears just by using a plain headband as the foundation.
You can make all kinds of DIY Mickey designs with a simple headband. The options are truly endless!
Pros of Homemade Disney Ears:
- Homemade Disney ears make quite the durable accessory, which is perfect for people seeking to make a lasting souvenir.
- Allows for plenty of customization options, ranging from the length and thickness of the ears to design and personal flair.
Cons of Homemade Disney Ears:
- Obviously, these require more time and effort to build, which I see more as an advantage if you’re looking to create a bonding experience with your kids.
If you just can’t seem to fit this somewhat lengthy activity within your busy schedule, there’s nothing wrong with sticking to the first method!
But if you are interested in learning how to make Mickey ears from scratch, and don’t mind getting your hands a little dirty, I’ve broken down the steps you need to fulfill your children’s magical fantasies.
How To Make DIY Mickey Ears From Scratch
Materials Needed:
- Cardboard
- Markers
- Headbands
- Fabric of your choice (whatever your design calls for)
- Pencil
- (Optional) Poly-Fil
Tools Needed:
- Scissors
- (Optional) Precision knife or box cutter
- Hot Glue Gun
Step 1: Determine the Size of Your Mickey Ears
Each pair of Mickey ears is different. It’s up to you and your kids to determine how big or small you want them to be.
Of course, the bigger the ears, the wider the headband you’ll require, but you’ll be fine if you stay within the confines of 3″-5″ in diameter.
Step 2: Trace the Ears

Photo credit: Craftify My Love
Trace two circle on a piece of cardboard using a circular object that matches the size for the ears you chose (like a cup, bowl, or a round lid).
You’ll want to trace two pairs of this circular pattern on the cardboard to make each ear as durable as possible. When you’re done tracing, you’ll have four circles – two for each ear.
Step 3: Trace the Headband Curve
Since the ears will eventually end up on the headband you’re using, you’ll need to cut the bottom part of the circle to fit the headband.
Place the headband near the bottom each traced circle. Using the headband as a guide, trace the curve of your headband on the circle so that it creates a curved line.
This step should look something like this.
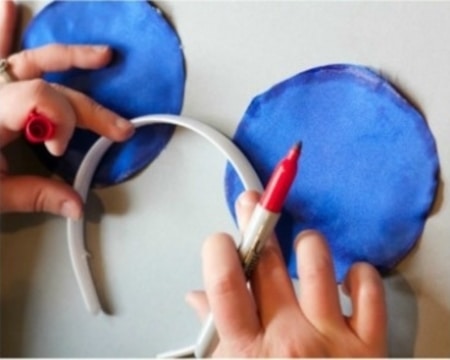
Photo credit: Moms Without Answers
If you don’t want to deal with the hassle of measuring just right, simply follow this Mickey ears template.
Step 4: Cut Out the Mickey Ears
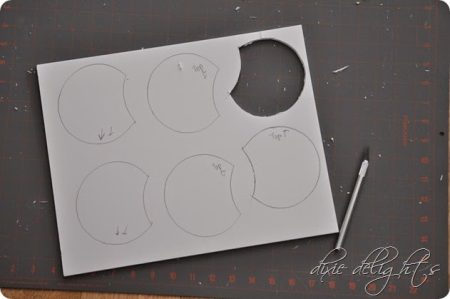
Photo credit: Dixie Delights
Now that you’ve finished tracing the ears, it’s time to cut it. This is where the precision knife comes in handy since you’ll need to cut out the cardboard with precision. If you don’t have that, a simple box cutter will do.
Step 5: Trace the Mickey Ears Pattern On Your Fabric
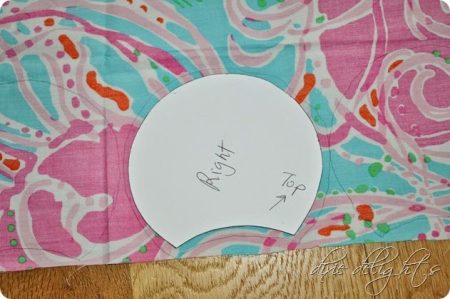
Photo credit: Dixie Delights
Trace each Mickey ear cardboard cutout onto your fabric with a pencil, making sure to add an allowance of about .5 inch on each one (this is important for a later step).
It’s important to trace the cardboard cutouts onto THE BACKSIDE of the fabric – you don’t want to commit the mistake of glueing your fabric inside-out and have to start back at step 1.
Step 6: Cut Out the Fabric
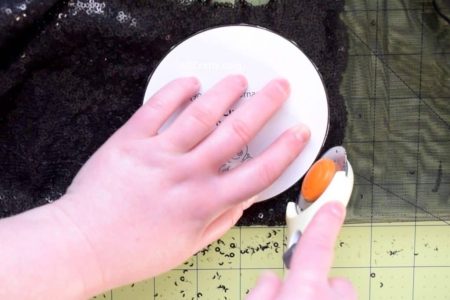
Photo credit: AB Crafty
No explanation is needed here – simply cut out the traced fabric! You should have 2 pairs of ear cutout, for a total of 4 Mickey ear shaped pieces of fabric.
Step 7: Glue the Fabric to the Cardboard Cutouts
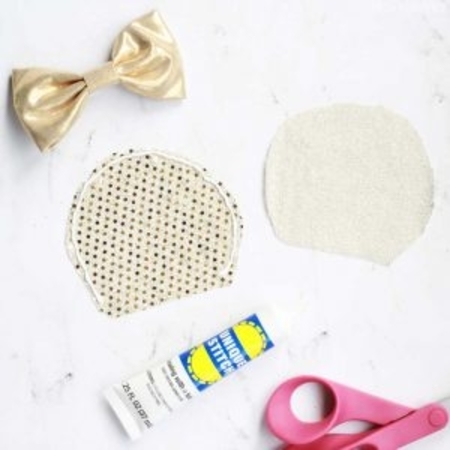
Photo credit: Pretty Providence
Now, there are two different ways to glue each fabric piece onto it’s corresponding Mickey ear cardboard cutout:
- Add glue to the fabric and then lay the cardboard cutout on top it.
- Add glue to the cardboard cutout and then lay it on top of the fabric cutout.
Regardless of which method you choose, the important thing is to make sure the .5 inch allowance on the fabric is consistent around the entire edge.
In other words, there will be extra fabric that extends beyond the cardboard cutout’s edges.
Step 8: Glue Your Ear Pairs Together
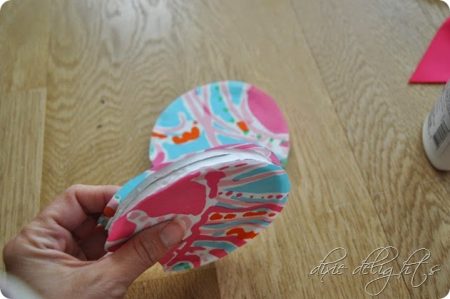
Photo credit: Dixie Delights
Now, glue the cardboard sides of your ears together. When you’re done, the cardboard should be on the inside, and the fabric should be on the outside. Do this twice: once for each pair of fabric/cardboard ears.
Oh, and remember that extra fabric along the edges? It’s time to glue it all together!
All glue to the fabric so that when you fold it over, it secures and hides the cardboard inside.
Step 9: Glue Your Ears to the Headband
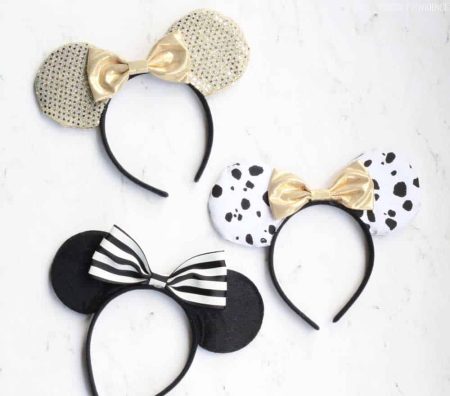
Photo credit: Pretty Providence
At this point your ears are almost complete. All you need to do is attach them to the headband!
Simply glue your ears to your headband along the curved edge and congratulations! You have your very own pair of DIY Mickey Ears.
Bringing the Magical World of Disney to Your Home
The rest of the design is up to you and your kids’ preference. Try to experiment with different characters and ideas! Tinker with simple bows or add more complex designs such as horns, floral accessories, ribbons, etc.
And whether you went with option 1 or option 2, I have no doubt your Mickey ears are perfect for your next trip to Disney.
Learn how to make more homemade keepsakes with your kids by following one of our other how-to guides: