Making friendship bracelets is a great pastime for kids and is beneficial in developing motor skills. They are colorful, vibrant, and symbolize the friendship between people.
In this article, I’ll share step-by-step instructions on how to make a friendship bracelet as well as easy friendship bracelet patterns that are great for beginners and kids.
But first, here’s a brief history of what friendship bracelets are.
What Are Friendship Bracelets?
Friendship bracelets are given from one person to another to symbolize their friendship. According to most, friendship bracelets originated from the indigenous tribes of Central and South America.
Traditionally one makes the bracelet and puts it on the wrist or ankle of their friend. The receiver of the bracelet then makes a wish and wears the bracelet until it naturally falls off. Once it does, the receiver’s wish comes true.
Prepping to Make a Friendship Bracelet
Before learning how simple friendship bracelets are to make, you want to make sure and have all the materials ready, knots learned, and the pattern you want to make chosen.
Materials
– Embroidery Floss
– Tape or Binder Clip
– Scissors
– Tape Measure
– Beads and Charms (optional)
While embroidery floss is what’s mostly used for friendship bracelets, other kid-friendly alternatives are perle cotton or yarn.
How to Make Knots
To be able to make the patterns, kids first need to learn the four basic knots. Of these 4 basic knots, we’ll be using the forward knot and backward knots for the 3 beginner friendly patterns.
I Loom provides nicely detailed videos that teach how to do each knot:
Forward Knot – Two knots that allow a string to travel from left to right.
Backward Knot – Two knots that allow a string to travel from right to left.
Forward-Backward Knot – Two knots that combine half of a forward knot followed by half of a backward knot.
Backward-Forward Knot – Two knots that combine half of a backward knot followed by half of a forward knot.
3 Beginner-Friendly Patterns
Here are three beginner-friendly patterns to start with. Don’t worry – I’ll discuss how to make each one in more detail later on.
The Chinese Staircase
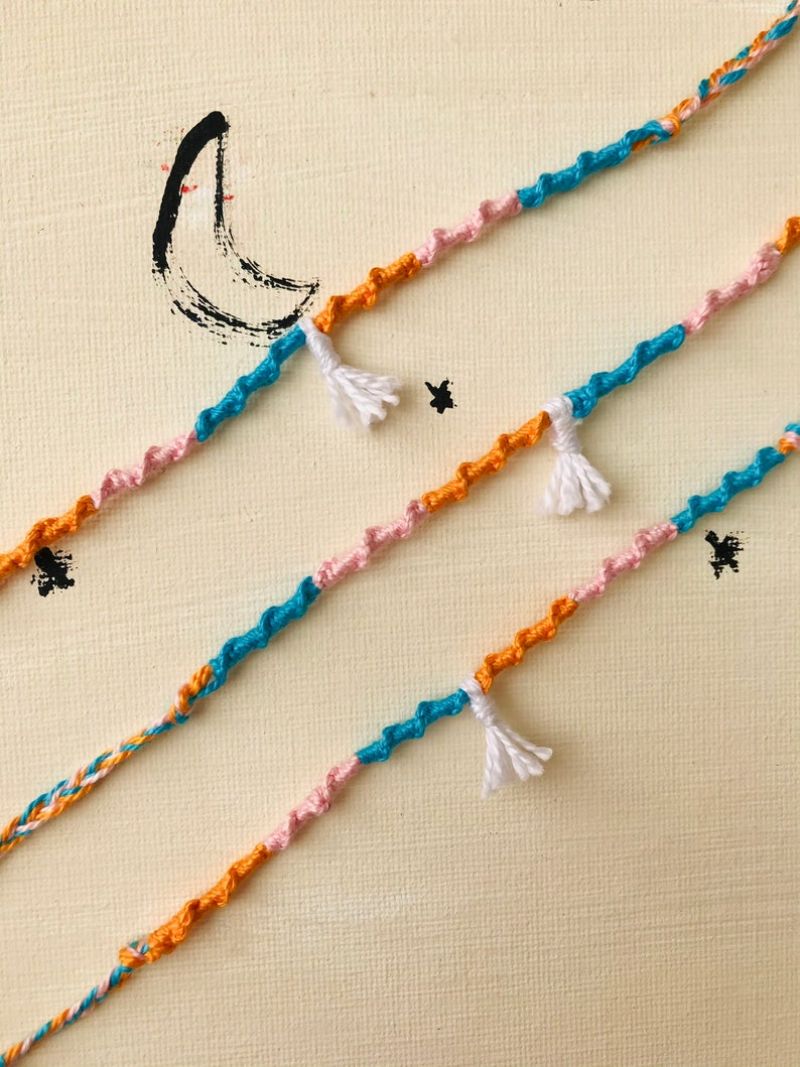
Photo credit: MagdalenaMade
An easy pattern that’s formed by using the forward knot and then tying the colored strings around each other.
Candy Stripe
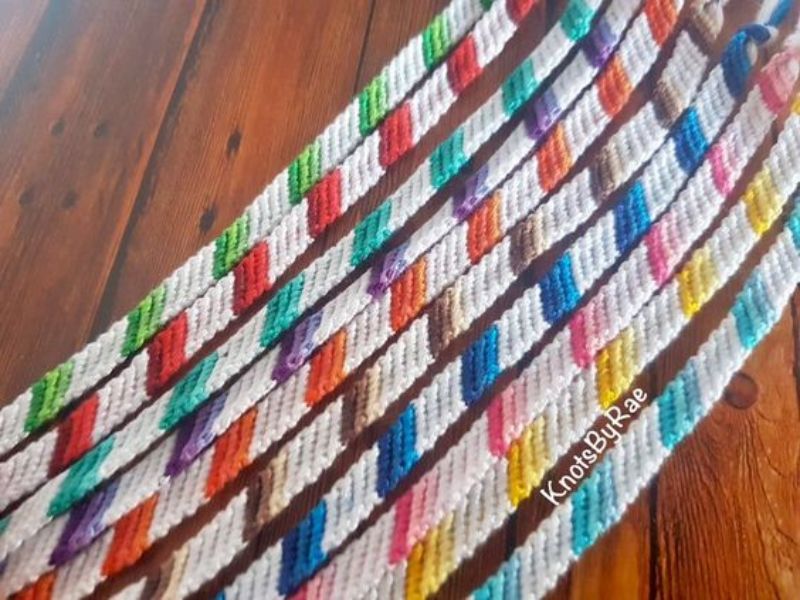
Photo credit: KnotsByRae
This is another easy pattern since kids will only need to remember how to do the forward knot.
Chevron Pattern
![]()
Photo credit: AuraJewelryArt
This next pattern requires two knots (forward and backward knots), but they’re the same knots mirrored to produce this arrow pattern.
Choosing the Right Colors
The colors you choose can have meanings behind them, so here are some of the most common colors with their meanings:
– Red: passion, love, fire, action
– Orange: happiness, excitement, vitality
– Yellow: friendliness, optimism, creativity
– Green: natural, compassion, life
– Blue: peace, inspiration, loyalty, sky
– Purple: sophistication, luxury, royalty
– Pink: affection, love, kindness, tenderness
– Black: power, confidence, mystery
– Brown: stability, comfort, reliability, loyalty
– White: kindness, truth, clarity, light
If you’re not sure what colors your friend likes, you can use this guide as a basis. Does your friend exude royalty and mystery? Then use purple and black!
How to Make a Friendship Bracelet
Once kids familiarize themselves with the knots and decide which pattern to make, they can start making friendship bracelets.
Here are simple step-by-step instructions to help you and your kids make three of the most common friendship bracelet patterns.
Setting Up
Cut about 36 inches of string for each color you’ll be using. The more strings you use, the thicker the bracelet will be, but it will take longer to make as well.
For beginners, try using about 4 to 6 pieces of string. Of course, you can use any number of strings you’re comfortable with!
Then, tie your strings together on one end, about 1 or 2 inches down, and clip them to a piece of cardboard or tape them to a flat surface. After that, kids are ready to knot!
Chinese Staircase Friendship Bracelet in 3 Steps
1. Make Forward Knots
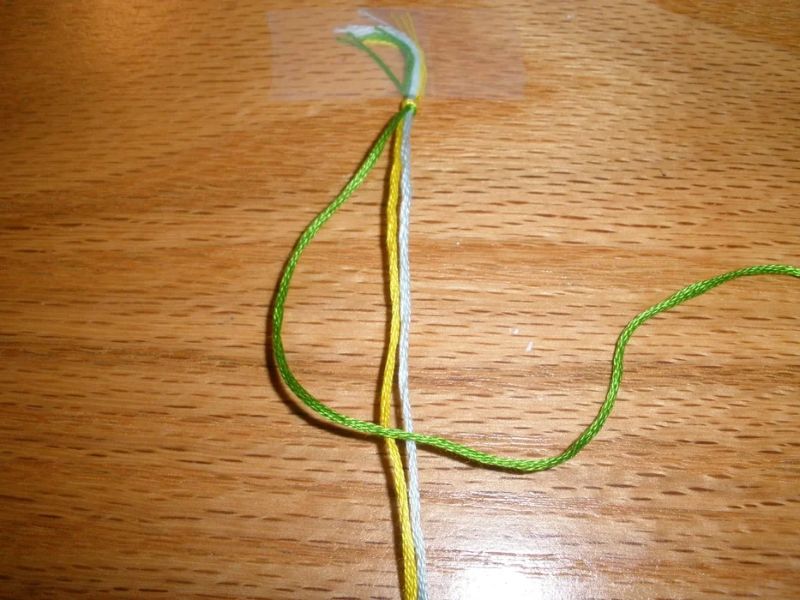
Photo credit: Instructables
Once you’ve set up your strings, take one of them and do a couple of forward knots around all the other strings. You can also choose to do backward knots for this pattern. Take note of how many knots you make!
2. Switch It Up
If you’re satisfied with the length of the first string’s knots, then switch to another color and do the same, using the same type of knot and making the same number of knots you did in the previous step.
3. Repeat
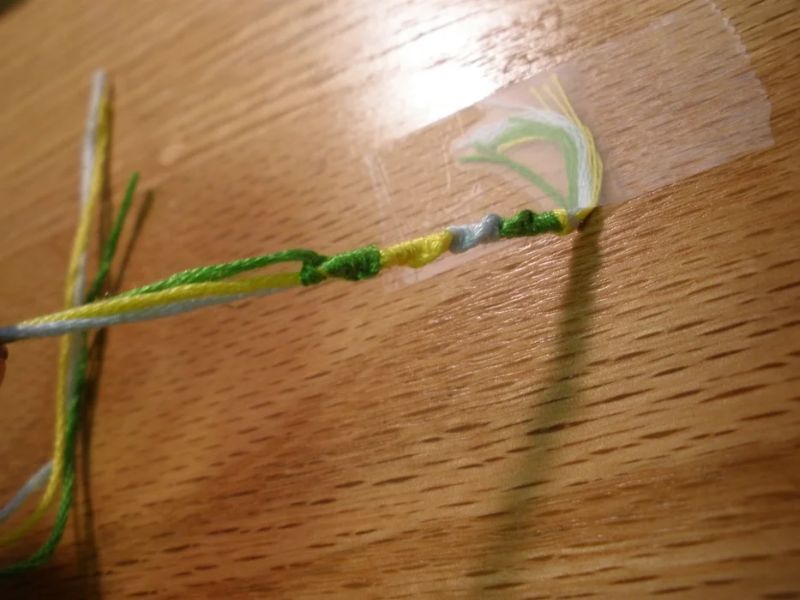
Photo credit: Instructables
Once you’ve cycled through all the colors, just go back to the first one and repeat the cycle until you’ve run out of string!
If you or your kids prefer to follow along with a video tutorial, Jadyn Crafts provides a nice beginner-friendly guide.
Candy Stripe Friendship Bracelet in 3 Steps
1. Make Forward Knots

Photo credit: The Crafty Ninja
For this pattern, it’s important to take note of the order of your strings. I’ll be using numbers (#1 for black, #2 for blue, #3 for yellow, and #4 for pink), but it’s up to you what system works best for you!
First, you’ll be doing a series of forward knots with the left-most string, the black string (#1) in this case.
Make a forward knot using string #1 (black) on string #2 (blue). Continuing to use #1, do the same on #3 (yellow) and then #4 (pink).
2. Switch It Up
Once you’re done with the 1st string, the order of the strings starting from the left will now be 2-3-4-1.
Just do the same forward knots using #2 on #3, then #4, and then #1, which should now be in the last position.
After this, the order will be 3-4-1-2, and the knot pattern just repeats with strings #3 and #4.
3. Repeat
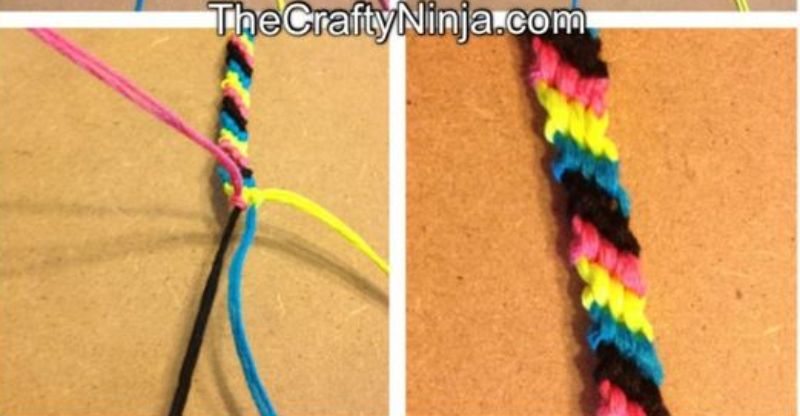
Photo credit: The Crafty Ninja
Once you’re done with all 4 colors, just start back at string number 1 and repeat the cycle until you’re satisfied with the length.
Here’s a beginner-friendly video tutorial from Kat Hallinan you and your kids can follow as well.
Chevron Patterned Friendship Bracelet in 5 Steps
1. Prepare the Strings
Since the chevron pattern combines the forward and backward knots, there’s an extra step in the string preparation.
First, choose your colors (for beginners, I’d recommend a max of 4 strings for this pattern). Once you’ve chosen your colors, cut 72 inches for each of them. Then, fold the strings in half and tie a knot on the folded end.
Lastly, lay and secure your strings so that there are a set of four on either side.
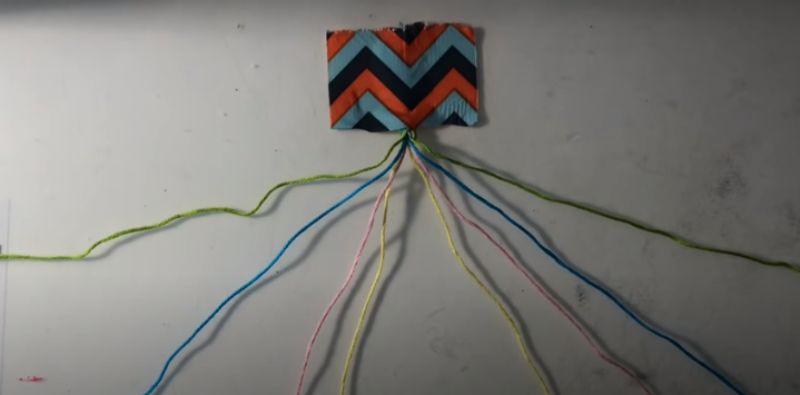
Photo credit: Kinsey B
For this pattern, it’s also important to take note of the order of the strings, so let’s label them again. Green is #1, blue #2, pink #3, and yellow #4.
So, our current order starts from the left: 1-2-3-4, 4-3-2-1. Notice how the pattern is just a mirror of itself.
2. Make Forward Knots
For these knots, we’ll focus first on the strings located on the left side, 1-2-3-4. Using #1 (green), do a forward knot on #2 (blue), then #3 (pink), and then #4 (yellow).
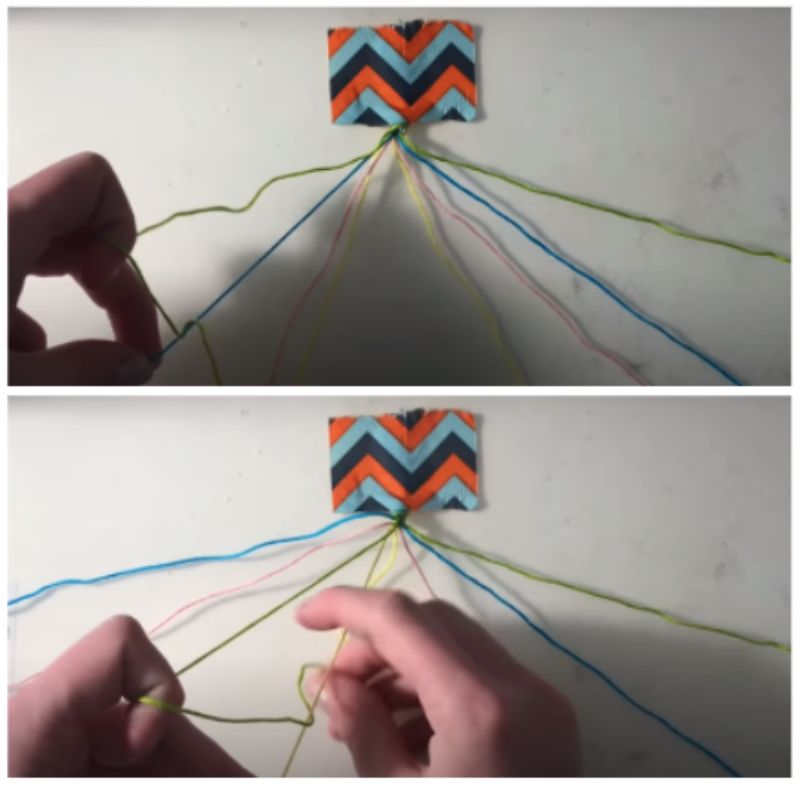
Photo credit: Kinsey B
Before doing the same with string #2, we’ll need to first do some backward knots on the right set of strings.
3. Make Backward Knots
For these knots, we’ll focus on numbers 4-3-2-1. Starting from the right side this time, use #1 and make a backward knot on #2, then #3, and then on #4.
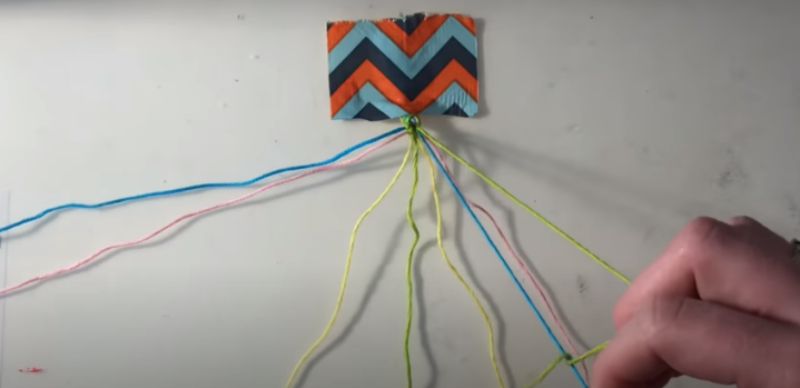
Photo credit: Kinsey B
Again, stop once you’ve made a backward knot using string #1 on strings #2, #3, and #4.
4. Meeting Halfway
If you’ve done each side correctly, both string #1s should meet in the middle. Take the left #1 and make a forward knot on the right #1.
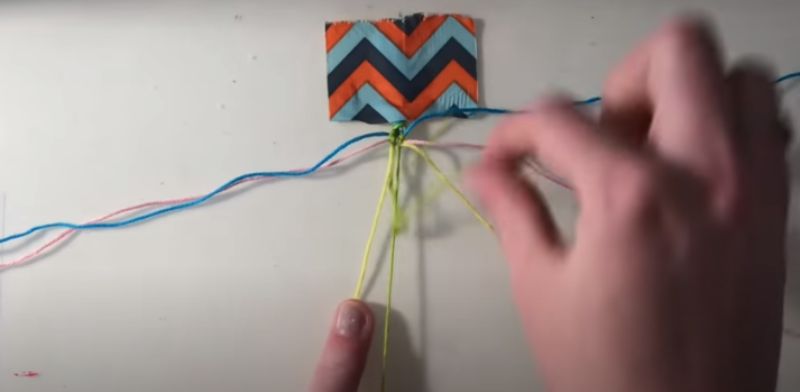
Photo credit: Kinsey B
It makes no difference doing a forward or backward knot for this step as long as both strings are knotted together.
5. Repeat
Repeat steps 2 through 4 using both #2 strings (blue), then do the same with both #3 strings (pink), and then both #4 strings (yellow). After completing steps 2 through 4 with the set of #4 strings, cycle back to the the set of #1 strings and repeat until you achieve the desired length.
If you or your kids prefer a video tutorial for this, Kinsey B has an easy-to-follow beginner’s guide.
Bonus Friendship Bracelet Ideas
Here are 2 bonus ideas for kids to add more flair to their friendship bracelets.
Incorporating Beads
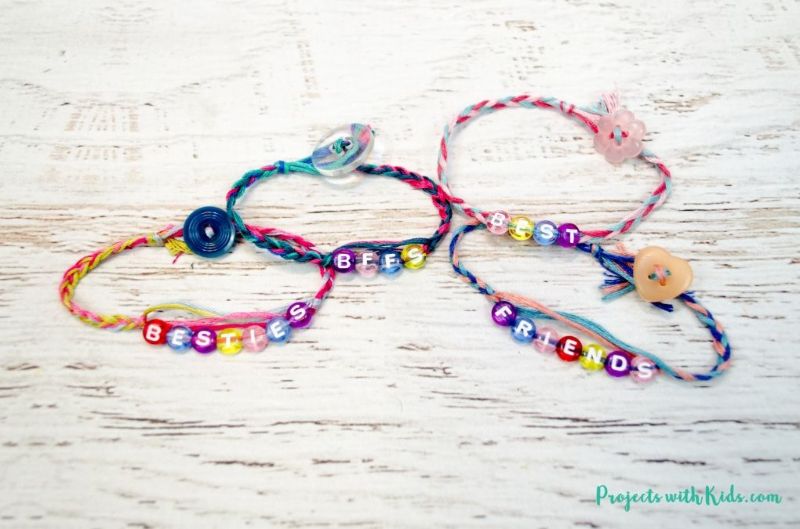
Photo credit: Projects With Kids
Projects With Kids shows kids how to add letter beads and buttons to their friendship bracelets.
Incorporating Charms
In this video, Masha Knots attaches the strings to the charms and utilizes the chevron pattern to make a friendship bracelet.
This method may be more advanced for beginners, so try practicing the chevron pattern without charms first before attempting this style!
DIY Friendship Bracelets for Lifelong Bonds
Teach your kid to make friendship bracelets so they can give a symbol of their bond to best friends, family members, and even teachers! Even though a friendship bracelet is temporary, the value from the gift will last forever.
Have you made friendship bracelets before? Have you had one made for you? Let me know in the comments below!
If your kids enjoyed making friendship bracelets, they might also enjoy crafting dream catchers as well!