
Tie dyeing is always a fun activity that allows kids and grown-ups alike to express their creativity, and bleach tie dyeing is equally as fun and different enough to spice up traditional tie dye crafts.
Bleach tie dye, or reverse tie dye, is when a black or dark colored shirt is bleached until a faded pattern is formed.
Below is a step-by-step guide that details all you and your kids will need to start bleach tie dye crafts including steps for coloring in those faded parts!
Preparation
Prepping for bleach tie dye crafts is almost the same as prepping for normal tie dye crafts, but with a few extra things to keep in mind.
Things You’ll Need:
– 100% cotton black t-shirt
– Bleach or a reverse tie dye kit
– Rubber bands
– Rubber gloves
– Goggles/Eye protection
– Face mask
– Wire rack
– Dye kit of your choice (I recommend Tulip’s One Step Dye Kit for ease of use)
– Resealable plastic bag (optional depending on the tie dye kit’s instructions)
Before Bleach Tie Dyeing, Remember To:
Choose Your Garment
I recommend cotton t-shirts as they are the most commonly used garment for tie dye crafts.
You can use any type of garment for bleach tie dye though, not just t-shirts! See my post on the 32 best shirts for tie dye that includes other cotton items to tie dye.
Use Dark Colored Clothing
While you can use any colored garment, using black or dark colored shirts will produce more prominent bleached areas.
Work Outdoors and Dress Appropriately
Wear old clothes while using bleach just in case it gets on your clothes. Bleach might also damage the surface you’re working on, so keep that in mind when choosing your work space.
Furthermore, I highly recommend wearing a face mask and goggles, especially if you’re working indoors – or do this outdoors if possible.
Bleach and Kids Don’t Mix
I would definitely not recommend that younger kids take part in the bleaching process. An alternative to bleach is a reverse tie dye kit, where kids can help out more.
Deciding on the Pattern
As with normal tie dye, deciding on the pattern is necessary in order to know exactly how to wrap the rubber bands around whatever garment you’re dying.
Here are 2 popular tie dye patterns that are easy to apply for both kids and adults. If these aren’t what you’re looking for, Parents.com has a guide with more patterns!
The Crumple
This nebula design, most commonly known as “the crumple,” from Parents.com is quite easy to do as all you need to do is to crumple the shirt and tie it with the rubber bands.
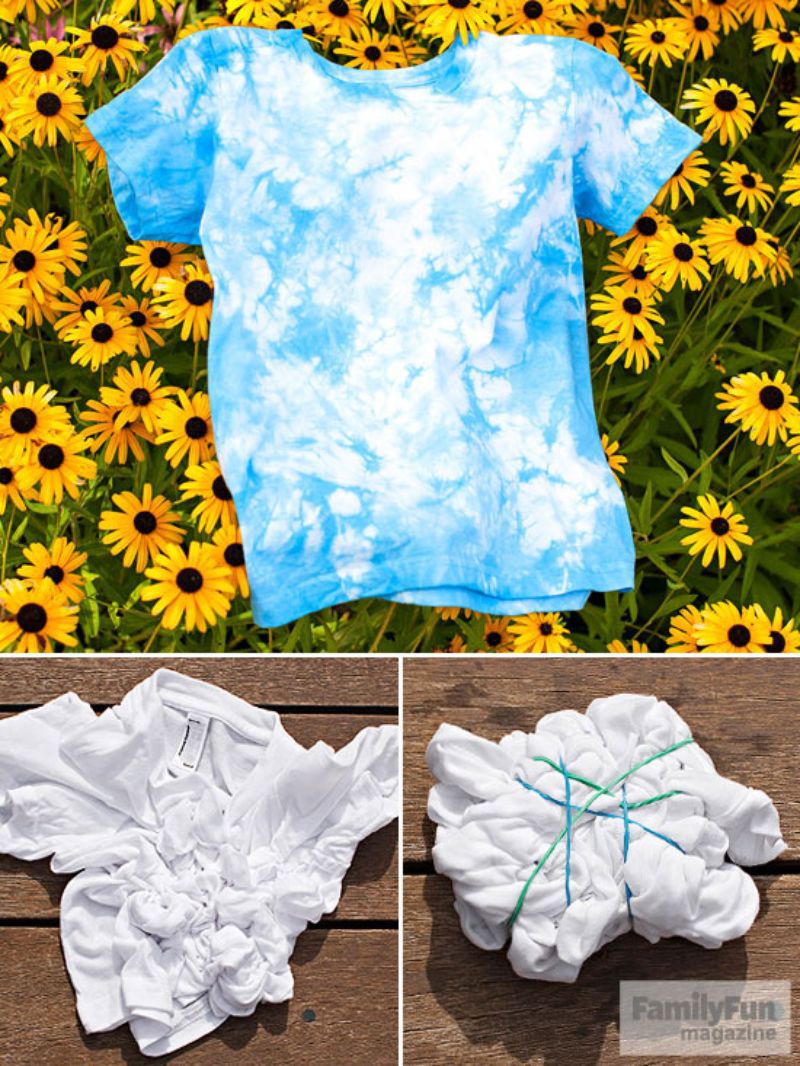
Photo credit: Parents
This pattern can be applied to any cotton garment, such as pants or bags. Pants in particular have very few options when it comes to patterns, so if you want to tie dye cotton sweatpants, this is the easiest pattern to apply.
Diagonal Stripes
Another pattern that’s easy to create is the diagonal striped design. All you have to do is fold the shirt accordion style starting from the bottom corner and towards the opposite top corner. Then wrap a rubber band every 1-2 inches once folded.
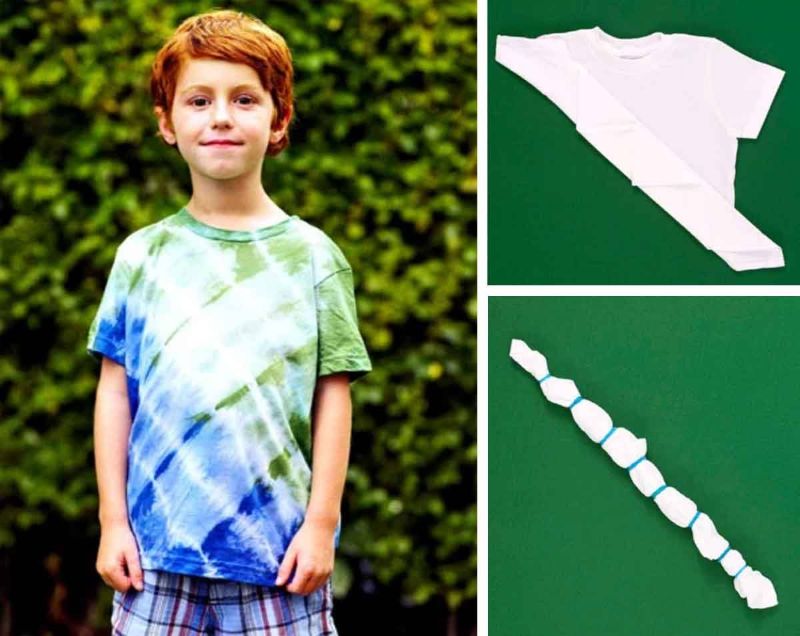
Photo credit: Parents
Don’t be afraid to experiment when it comes to patterns. Both these patterns can be applied for bleach tie dye crafts. The only difference is that the colored parts will be replaced with the faded ones.
Four Steps to Bleach Tie Dye
Below are the steps that will help you bleach tie dye as well as add colored dye to the bleached/ faded parts.
Take note that the first step assumes you’ve already prepared your materials and decided on and prepared your garment with a pattern.
1. Applying Bleach or Color Changer
Using Bleach
Starting with bleach, you’ll first have to decide how to apply it. For either of these methods, check on your garments until you’re satisfied with how faded the color is. Add more bleach if you aren’t satisfied yet.
Don’t leave them for too long as bleach can damage fabric!
Submerge
One method is to submerge the shirt in bleach. For this, you will need somewhere to submerge it, like a basin or a bucket, for about 10-20 minutes. Just add bleach to a basin and submerge the shirt into the bleach. Only add enough bleach to completely submerge your garment(s).
Pour
The other method is to pour bleach directly on the shirt and use your hands to spread it. You can do this in your kitchen sink if working indoors. Afterwards, lay it flat to allow the bleach to soak or put it on a wire rack over your sink/ bucket/ basin for about 10 minutes.
Using a Reverse Tie Dye Kit
If you’ve decided to use a reverse tie dye kit instead of bleach, mix the color changer according to the instructions. Next, apply the color changer to the shirt and leave it on a wire rack over your sink or bucket.
Whether you used bleach or the color changer, you’ll have something that looks like this:
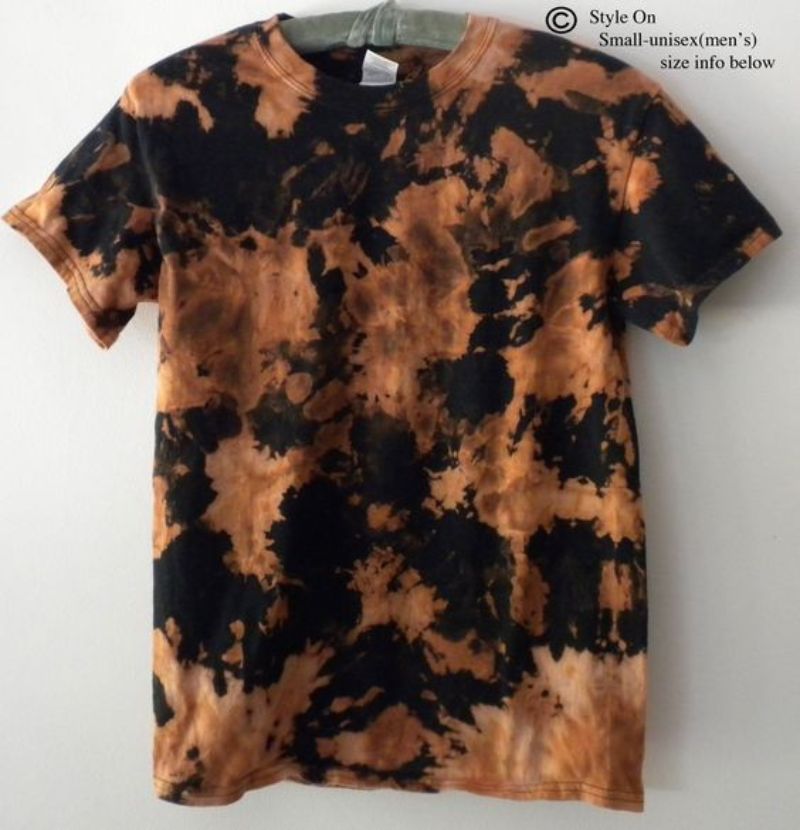
Photo credit: StyleOn
The bleached/ faded parts will appear brown or orange-ish, and that’s normal.
2. Rinsing the Bleach or Color Changer
If You Used Bleach
After you’re satisfied with how faded the shirt is, it’s now time to rinse the bleach out. This is better done by hand and in your sink. This may take several minutes to ensure the bleach is completely rinsed out.
If You Used a Reverse Tie Dye Kit
This can generally be done the same way as bleach, but follow your chosen kit’s instructions to be safe.
3. Bonus Step – Applying Colored Dye!
This step and the next are for those who decided to color in the faded parts. This is also where kids can start helping out!
After rinsing the bleach/ color changer out, keep the shirt damp (but not soaking wet) and lay it flat.
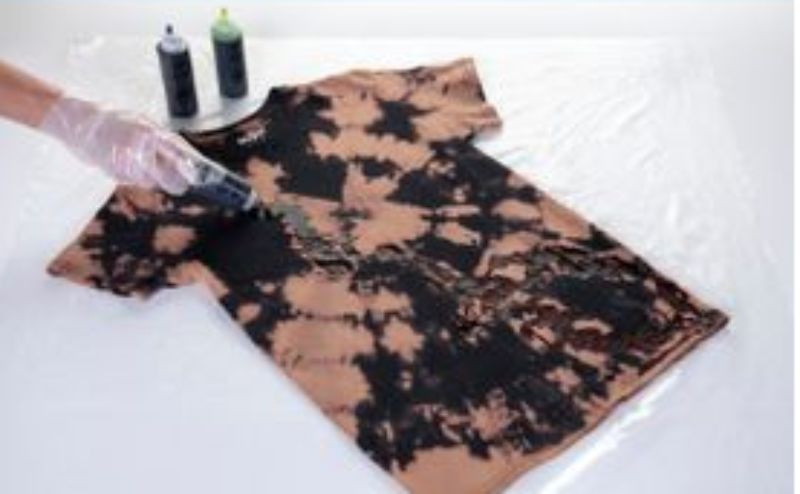
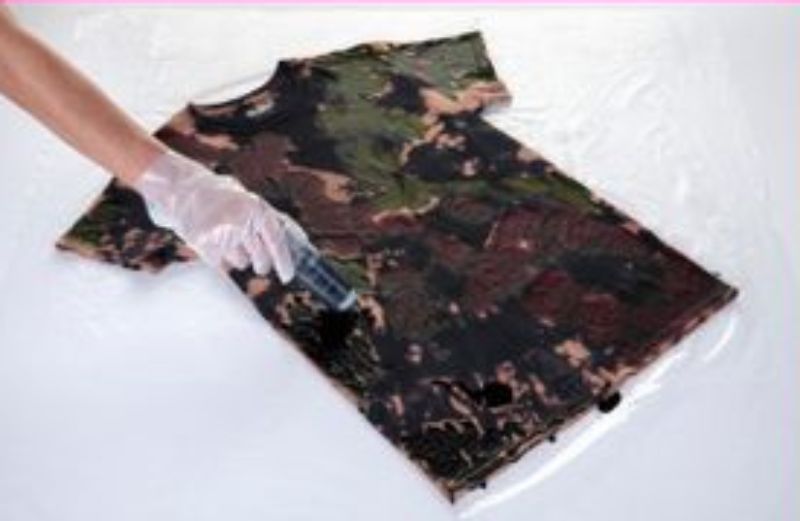
Photo credit: Tulip Color Crafts
Then, apply your chosen dyes onto the bleached areas by following the kit’s instructions. If you’re using Tulip’s One Step Dye Kit, then all you need to do is mix the dye powder with water and then squirt the desired color onto the shirt!
For beginners, try doing this slowly to avoid the colors mixing and keep in mind the color placements! You can also try putting colors that will blend well next to each other.
Of course, you and your kids can do this as carefully or as chaotic as you want, so go crazy!
4. Wrapping Up and Washing Up
Once you’re done applying the dyes, follow the instructions on the kit on how to set the dye. Some dyes require another rinsing before drying; other dyes would have you put the shirt inside a resealable plastic bag while still damp for about 8 hours to get the best results.
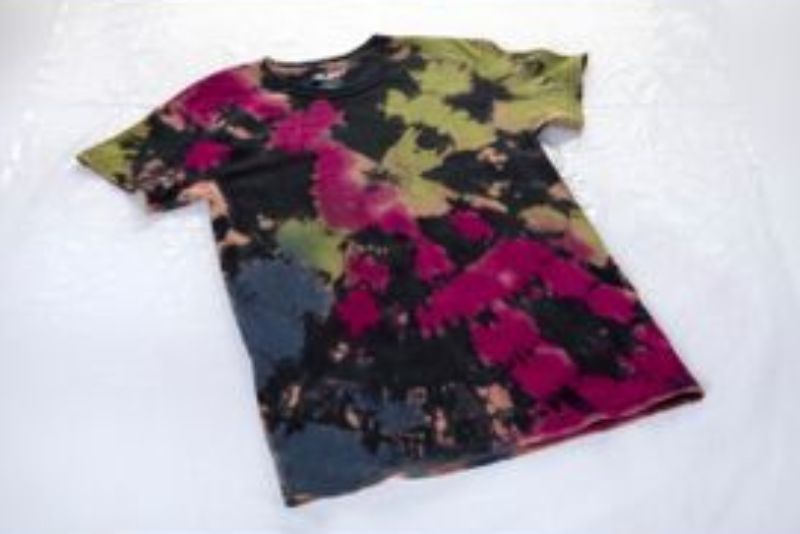
Photo credit: Tulip Color Crafts
Afterwards, wash your bleach tie dyed garment by itself. I’d still wash it by itself for the next 2-3 washes before washing it with other laundry.
Does it Come in Black?
Yes, tie dyed shirts can come in black! Don’t limit yourself by just using primarily white or light colored shirts/tops. As long as the shirt is 100% cotton, then you can still go crazy with it by using bleach or a reverse tie dye kit.
Why not try other cotton clothes such as black sweatshirts, hoodies, dresses, tank tops, or even sweatpants? Let your creativity shine and don’t be afraid to experiment! And if you’re looking for a more traditional tie dye craft, check out my post on how to tie dye a shirt.
Have you tried bleach or reverse tie dyeing before? Let me know how it went in the comments below!